PleromaをRaspberry piにインストールする

はじめに

これはFediverseの仕様だから仕方ないのだが、バックアップをとらず、PleromaやらMastodonを消去し、消去前と同じドメインを使うと、フォローリクエストが送られていなかったりタイムラインに投稿が乗らなかったり様々なエラーが生じる。
そこで、Raspberry piをインストールしなおし、Pleromaをインストールし使えるようにするまでをまとめた。

Pleromaとは

lainにより開発されている分散SNS。OStatusプロトコルとActivityPubプロト>コルにより、マストドンを含む他の分散SNSのインスタンスと連合を形成することができる。また、MastodonのAPIとある程度の互換性があるため、マストドン用のクライアント (スマートフォンアプリなど) を使用できる場合がある。

GNU/Linuxで動作する。インストールガイドはCentOS向け[1]とDebian向け[2]に書かれている。使用しているプログラミング言語はElixirである。マストドンと比較すると、低コストな計算機資源で動作することを標榜しており、512 MBのRAMでの運用[3]が報告されている。ライセンスはAGPLである。(マストドン日本語ウィキより)

文中にもある通り、なんとRaspberry Piでも動いてしまう。
Pleromaはバックエンドとフロントエンドが分離されていて、内部で動いているのはPleromaなのだが、外部UIはSoapboxみたいなこともできる。

1.Raspberry piにubuntuをインストールする。

インストール方法はRaspberry Piをセットアップする - 前編 -及びRaspberry Piをセットアップする - 後編 -と何ら変わりない。
一応sshを生成しておく。
この記事を書いてる途中に恐らくインストールは終わっていると思うのでターミナルでRaspberry Piを探す

terminal
1
2
3
4
5
6
7
8
9
$ sudo apt install arp-scan
$ sudo arp-scan -l --interface enp3s0
Interface: enp3s0, type: EN10MB, MAC: :::::, IPv4: 192.168.1.*
Starting arp-scan 1.9.7 with 256 hosts (https://github.com/royhills/arp-scan)
192.168.1.9 b8:27:eb:cb:df:7c Raspberry Pi Foundation
192.168.1.30 b8:27:eb:c3:1c:d3 Raspberry Pi Foundation
17 packets received by filter, 0 packets dropped by kernel
Ending arp-scan 1.9.7: 256 hosts scanned in 1.990 seconds (128.64 hosts/sec). 14 responded

多分9か30(あまりネットワーク状況がばれてもいいことがないので伏せさせていただいた)

terminal
1
ssh ubuntu@192.168.1.9

引っかかった。パスワードを変えてくれといわれるのでパスワードを変更する。
初期ユーザーはubuntu。パスワードもubuntu

Raspberry Piをセットアップする - 後編 -に従い、ユーザー追加、ホストネームの変更、ipアドレスの固定をしておく。
terminal
1
2
3
4
5
6
sudo adduser m0r016
sudo gpasswd -a m0r016 sudo
su - m0r016
sudo hostnamectl set-hostname magi-system-pleroma
sudo timedatectl set-timezone Asia/Tokyo
sudo nano /etc/netplan/99-ip.yaml
/etc/netplan/99-ip.yaml
1
2
3
4
5
6
7
8
9
10
network:
ethernets:
eth0:
dhcp4: false
optional: true
addresses: [192.168.1.31/24]
gateway4: 192.168.1.1
nameservers:
addresses: [192.168.1.1]
version: 2

設定ファイルの編集が終わったら反映する。

terminal
1
sudo netplan apply

以前、ipの固定は50-cloud-init.yamlを編集するようにと書いたのだが、【Ubuntu】 /etc/netplan/50-cloud-init.yamlを編集するの止めろを見る限り、別ファイルを生成したほうがいい。
かいつまんで説明すると、50-cloud-init.yamlは上書きされる可能性があり、上書きされたくないのならアルファベット順で後ろになるようなファイル名を生成してあげる必要がある。英語読むの大事。

terminal
1
2
3
4
5
6
$ sudo ufw allow 22
$ sudo ufw allow 80
$ sudo ufw allow 4000
$ sudo ufw enable
Command may disrupt existing ssh connections. Proceed with operation (y|n)? y
Firewall is active and enabled on system startup

ファイヤーウォールの設定もしておく。開けるのは22, 80, 4000。

いよいよpleromaの構築に移っていく。

2.Pleromaの構築

まずは必要なものをインストールする

terminal
1
2
3
4
5
6
7
8
sudo apt update
sudo apt full-upgrade
sudo apt install git build-essential postgresql postgresql-contrib cmake libmagic-dev nginx certbot
wget -P /tmp/ https://packages.erlang-solutions.com/erlang-solutions_2.0_all.deb
sudo dpkg -i /tmp/erlang-solutions_2.0_all.deb
sudo apt update
sudo apt install elixir erlang-dev erlang-nox
sudo apt install imagemagick ffmpeg libimage-exiftool-perl

バックエンドのインストールに移る。

terminal
1
2
3
4
5
6
7
8
9
10
sudo adduser pleroma
sudo gpasswd -a pleroma sudo
su - plerom
sudo mkdir -p /opt/pleroma
sudo chown -R pleroma:pleroma /opt/pleroma
cd /opt/pleroma
git clone -b stable https://git.pleroma.social/pleroma/pleroma /opt/pleroma
git checkout v2.3.0
screen -S pleroma
mix deps.get

Shall I install Hex? (if running non-interactively, use "mix local.hex --force") [Yn]と聞かれるのでYを押してEnter。
長くなるのでscreenで、セッションを保存しておくといいかも。tmuxを使えたら楽になるのかな?

3.configの生成

terminal
1
2
3
4
5
6
7
8
9
10
11
12
13
14
15
16
17
18
19
20
21
22
23
24
25
26
27
28
29
30
31
32
33
34
35
36
37
38
39
40
41
42
43
$ mix pleroma.instance gen
Shall I install rebar3? (if running non-interactively, use "mix local.rebar --force") [Yn] Y
// rebar3をインストールしましょうか?(非対話的に実行する場合は、"mix local.rebar --force "を使用してください)
What domain will your instance use? (e.g pleroma.soykaf.com) [] wut.m0r016.net
// あなたのインスタンスはどのようなドメインを使用しますか?
What is the name of your instance? (e.g. The Corndog Emporium) [wut.m0r016.net]
// インスタンスの名前は何ですか?
What email address do you want to use for sending email notifications? [yuuki12_25@icloud.com]
// 通知メールの送信に使用するメールアドレスを教えてください。
Do you want search engines to index your site? (y/n) [y] n
// 検索エンジンに自分のサイトをインデックスさせたいですか?
Do you want to store the configuration in the database (allows controlling it from admin-fe)? (y/n) [n] y
// 設定をデータベースに保存するか
What is the hostname of your database? [localhost]
// データベースのホスト名を教えてください。
What is the name of your database? [pleroma]
// データベースの名前を教えてください。
What is the user used to connect to your database? [pleroma]
// データベースに接続する際のユーザー名を教えてください。
What is the password used to connect to your database? [autogenerated]
// データベースに接続するためのパスワードは何ですか?
Would you like to use RUM indices? [n]
// RUMのインデックスを使ってみませんか?
What port will the app listen to (leave it if you are using the default setup with nginx)? [4000]
// アプリがリッスンするポートを教えてください(nginxのデフォルト設定を使用している場合はそのままにしてください)。
What ip will the app listen to (leave it if you are using the default setup with nginx)? [127.0.0.1]
// アプリがリッスンするIPを教えてください(nginxのデフォルト設定を使用している場合はそのままにしてください)。
What directory should media uploads go in (when using the local uploader)? [uploads]
// ローカルアップローダを使用している場合、どのディレクトリにメディアをアップロードする必要がありますか?
What directory should custom public files be read from (custom emojis, frontend bundle overrides, robots.txt, etc.)? [instance/static/]
// カスタム公開ファイル(カスタム絵文字、フロントエンドバンドルオーバーライド、robots.txtなど)はどのディレクトリから読み込むべきですか?
Do you want to strip location (GPS) data from uploaded images? This requires exiftool, it was detected as installed. (y/n) [y]
// アップロードされた画像から位置情報(GPS)を除去したいですか?これにはexiftoolが必要で、インストールされていることが検出されました。
Do you want to anonymize the filenames of uploads? (y/n) [n] y
// アップロードのファイル名を匿名化したいのですか?
Do you want to deduplicate uploaded files? (y/n) [n]
// アップロードされたファイルを重複排除しますか?
Writing config to config/generated_config.exs.
Writing the postgres script to config/setup_db.psql.
Writing /opt/pleroma/instance/static/robots.txt.

All files successfully written! Refer to the installation instructions for your platform for next steps.
Please transfer your config to the database after running database migrations. Refer to "Transfering the config to/from the database" section of the docs for more information.
terminal
1
2
3
4
mv config/{generated_config.exs,prod.secret.exs}
sudo -Hu postgres psql -f config/setup_db.psql
MIX_ENV=prod mix ecto.migrate
MIX_ENV=prod mix phx.server

これでpleromaの生成はできた。nginxの設定をしていく。

4.nginxの設定

terminal
1
2
3
4
sudo certbot certonly --email your@email -d your.domain --standalone
sudo cp /opt/pleroma/installation/pleroma.nginx /etc/nginx/sites-available/pleroma.nginx
sudo ln -s /etc/nginx/sites-available/pleroma.nginx /etc/nginx/sites-enabled/pleroma.nginx
sudo systemctl restart nginx.service

ドキュメントの通りに進めるとこう。
なのだが私の場合 [User] –> [Proxy] –> [Pleroma] のようにリバースプロキシを噛ませている。
もちろん読み飛ばして次のセクションに進んでもらって構わない。

/etc/nginx/sites-enabled/pleroma
1
2
3
4
5
6
7
8
9
10
11
12
13
14
15
16
17
18
19
20
21
22
23
24
25
26
27
28
29
30
31
32
33
34
35
36
37
38
39
40
41
42
43
44
45
46
47
proxy_cache_path /tmp/pleroma-media-cache levels=1:2 keys_zone=pleroma_media_cache:10m max_size=10g
inactive=720m use_temp_path=off;

upstream phoenix {
server 127.0.0.1:4000 max_fails=5 fail_timeout=60s;
}

server {
server_name wut.m0r016.net;

listen 80 default_server;
listen [::]:80 default_server;

gzip_vary on;
gzip_proxied any;
gzip_comp_level 6;
gzip_buffers 16 8k;
gzip_http_version 1.1;
gzip_types text/plain text/css application/json application/javascript text/xml application/xml application/xml+>

// the nginx default is 1m, not enough for large media uploads
client_max_body_size 16m;
ignore_invalid_headers off;

proxy_http_version 1.1;
proxy_set_header Upgrade $http_upgrade;
proxy_set_header Connection "upgrade";
proxy_set_header Host $http_host;
proxy_set_header X-Forwarded-For $proxy_add_x_forwarded_for;

location / {
proxy_pass http://phoenix;
}

location ~ ^/(media|proxy) {
proxy_cache pleroma_media_cache;
slice 1m;
proxy_cache_key $host$uri$is_args$args$slice_range;
proxy_set_header Range $slice_range;
proxy_cache_valid 200 206 301 304 1h;
proxy_cache_lock on;
proxy_ignore_client_abort on;
proxy_buffering on;
chunked_transfer_encoding on;
proxy_pass http://phoenix;
}
}

これはPleroma側。80ポートで受け付けlocalhost:4000に流すようにしている。

/etc/nginx/sites-enabled/wut.m0r016.net
1
2
3
4
5
6
7
8
9
10
11
12
13
14
15
16
17
18
19
20
21
22
23
24
25
26
27
28
29
30
31
32
33
34
35
36
37
38
39
40
41
42
43
44
45
46
server {
server_name wut.m0r016.net;
listen 80;
listen [::]:80;
location ^~ /.well-known {
root /usr/share/nginx/html/ssl-proof;
}

location / {
return 301 https://$server_name$request_uri;
}
}
server {
server_name wut.m0r016.net;
listen 443 ssl http2;
listen [::]:443 ssl http2;
ignore_invalid_headers off;
proxy_http_version 1.1;
proxy_set_header Upgrade $http_upgrade;
proxy_set_header Connection "upgrade";
proxy_set_header Host $http_host;
proxy_set_header X-Forwarded-For $proxy_add_x_forwarded_for;

location / {
proxy_pass http://192.168.1.31;
}
location ~ ^/(media|proxy) {
slice 1m;
proxy_cache_key $host$uri$is_args$args$slice_range;
proxy_set_header Range $slice_range;
proxy_cache_valid 200 206 301 304 1h;
proxy_cache_lock on;
proxy_ignore_client_abort on;
proxy_buffering on;
chunked_transfer_encoding on;
proxy_pass http://192.168.1.31;
}
location /api/fedsocket/v1 {
proxy_request_buffering off;
proxy_pass http://192.168.1.31/api/fedsocket/v1;
}
location /api/v1/announcements {
proxy_request_buffering off;
proxy_pass http://192.168.1.31/api/v1/announcement;
}
}

これはプロキシサーバー側。証明書を取得していく。

terminal
1
2
3
4
5
6
7
8
9
10
11
12
13
14
15
16
17
18
19
20
21
22
23
24
25
26
27
28
29
30
31
32
33
34
35
36
37
38
39
40
41
42
43
44
45
46
47
48
49
50
51
52
53
54
55
56
57
58
59
60
61
62
63
64
65
66
67
68
$ sudo certbot
Saving debug log to /var/log/letsencrypt/letsencrypt.log
Plugins selected: Authenticator nginx, Installer nginx

Please choose an account
- - - - - - - - - - - - - - - - - - - - - - - - - - - - - - - - - - - - - - - -
1: magi-system@2019-08-27T03:57:49Z (aeee)
2: MAGI-SYSTEM@2019-03-09T17:12:48Z (37c0)
- - - - - - - - - - - - - - - - - - - - - - - - - - - - - - - - - - - - - - - -
Select the appropriate number [1-2] then [enter] (press 'c' to cancel): 1
// 該当する番号を[1-2]で選択し、[Enter]を押す(キャンセルする場合は'c'を押す)。
Which names would you like to activate HTTPS for?
// どの名前でHTTPSを有効にしたいですか?
- - - - - - - - - - - - - - - - - - - - - - - - - - - - - - - - - - - - - - - -
1: kyt-giken.com
2: m0r016.net
3: file.m0r016.net
4: identity.m0r016.net
5: msbtn.m0r016.net
6: wut.m0r016.net
7: www.m0r016.net
8: slum.cloud
9: dev.slum.cloud
10: game.slum.cloud
11: matrix.slum.cloud
12: msb.slum.cloud
13: note.slum.cloud
14: relay.slum.cloud
- - - - - - - - - - - - - - - - - - - - - - - - - - - - - - - - - - - - - - - -
Select the appropriate numbers separated by commas and/or spaces, or leave input
blank to select all options shown (Enter 'c' to cancel): 6
Obtaining a new certificate
Performing the following challenges:
http-01 challenge for wut.m0r016.net
Waiting for verification...
Cleaning up challenges
Deploying Certificate to VirtualHost /etc/nginx/sites-enabled/pl.m0r016.net

Please choose whether or not to redirect HTTP traffic to HTTPS, removing HTTP access.
- - - - - - - - - - - - - - - - - - - - - - - - - - - - - - - - - - - - - - - -
1: No redirect - Make no further changes to the webserver configuration.
2: Redirect - Make all requests redirect to secure HTTPS access. Choose this for
new sites, or if you're confident your site works on HTTPS. You can undo this
change by editing your web server's configuration.
- - - - - - - - - - - - - - - - - - - - - - - - - - - - - - - - - - - - - - - -
Select the appropriate number [1-2] then [enter] (press 'c' to cancel): 2
Redirecting all traffic on port 80 to ssl in /etc/nginx/sites-enabled/pl.m0r016.net

- - - - - - - - - - - - - - - - - - - - - - - - - - - - - - - - - - - - - - - -
Congratulations! You have successfully enabled https://wut.m0r016.net

You should test your configuration at:
https://www.ssllabs.com/ssltest/analyze.html?d=wut.m0r016.net
- - - - - - - - - - - - - - - - - - - - - - - - - - - - - - - - - - - - - - - -

IMPORTANT NOTES:
- Congratulations! Your certificate and chain have been saved at:
/etc/letsencrypt/live/wut.m0r016.net/fullchain.pem
Your key file has been saved at:
/etc/letsencrypt/live/wut.m0r016.net/privkey.pem
Your cert will expire on 2021-07-21. To obtain a new or tweaked
version of this certificate in the future, simply run certbot again
with the "certonly" option. To non-interactively renew *all* of
your certificates, run "certbot renew"
- If you like Certbot, please consider supporting our work by:

Donating to ISRG / Let's Encrypt: https://letsencrypt.org/donate
Donating to EFF: https://eff.org/donate-le
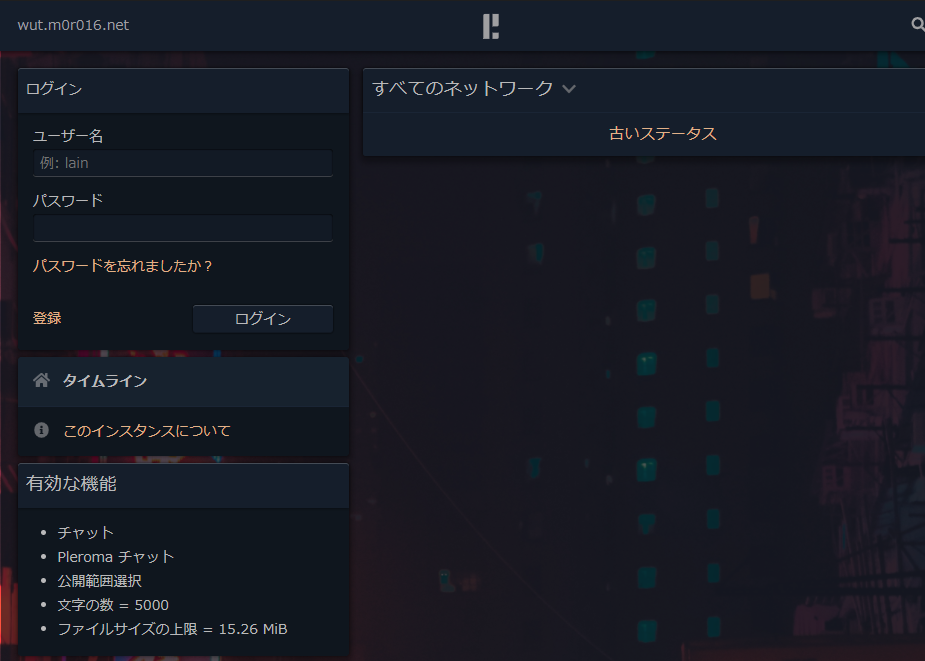
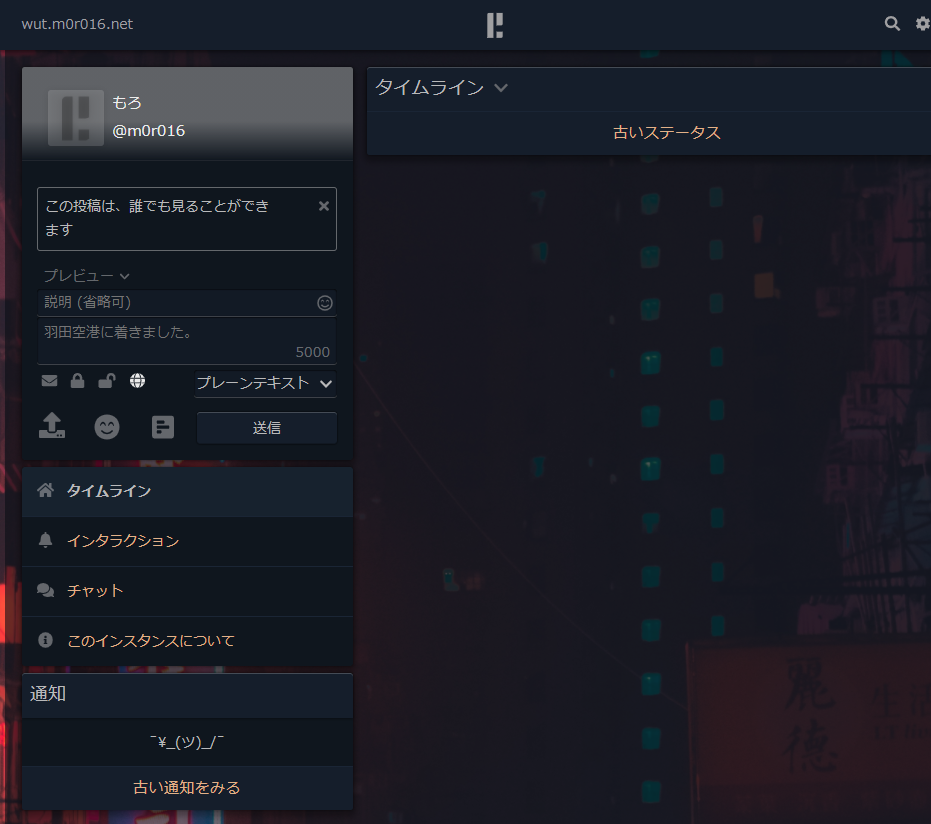
これで取得ができた。nginxの設定に戻る。

/etc/nginx/sites-enabled/wut.m0r016.net
1
2
3
4
5
6
7
8
9
10
11
12
13
14
15
16
17
18
19
20
21
22
23
24
25
26
27
28
29
30
31
32
33
34
35
36
37
38
39
40
41
42
43
44
45
46
47
48
49
50
51
52
53
server {
- if ($host = wut.m0r016.net) {
- return 301 https://$host$request_uri;
- } # managed by Certbot
server_name wut.m0r016.net;
listen 80;
listen [::]:80;
location ^~ /.well-known {
root /usr/share/nginx/html/ssl-proof;
}

location / {
return 301 https://$server_name$request_uri;
}
}
server {
server_name wut.m0r016.net;
listen 443 ssl http2;
listen [::]:443 ssl http2;
// ssl_trusted_certificate /etc/letsencrypt/wut/pl.m0r016.net/chain.pem;
// ssl_certificate /etc/letsencrypt/live/wut.m0r016.net/fullchain.pem;
// ssl_certificate_key /etc/letsencrypt/live/wut.m0r016.net/privkey.pem;

ignore_invalid_headers off;
proxy_http_version 1.1;
proxy_set_header Upgrade $http_upgrade;
proxy_set_header Connection "upgrade";
proxy_set_header Host $http_host;
proxy_set_header X-Forwarded-For $proxy_add_x_forwarded_for;

location / {
proxy_pass http://192.168.1.31;
}
location ~ ^/(media|proxy) {
slice 1m;
proxy_cache_key $host$uri$is_args$args$slice_range;
proxy_set_header Range $slice_range;
proxy_cache_valid 200 206 301 304 1h;
proxy_cache_lock on;
proxy_ignore_client_abort on;
proxy_buffering on;
chunked_transfer_encoding on;
proxy_pass http://192.168.1.31;
}
location /api/fedsocket/v1 {
proxy_request_buffering off;
proxy_pass http://192.168.1.31/api/fedsocket/v1;
}
location /api/v1/announcements {
proxy_request_buffering off;
proxy_pass http://192.168.1.31/api/v1/announcement;
}
}

certbotに書き換えられた部分を消しておく。
恐らく既に接続はできるはずだ。接続してみる。Pleroma

接続することができた。軽く登録しておく。登録をクリック。

欄を埋め、送信をクリック。

そうすると無事アカウントが作成、投稿ができるようになる。

5.デーモン化

/etc/systemd/system/pleroma.service
1
2
3
4
5
6
7
8
9
10
11
12
13
14
15
[Unit]
Description=Pleroma social network
After=network.target postgresql.service

[Service]
ExecReload=/bin/kill $MAINPID
KillMode=process
Restart=on-failure
User=pleroma
Environment="MIX_ENV=prod"
WorkingDirectory=/opt/pleroma
ExecStart=/usr/bin/mix phx.server

[Install]
WantedBy=multi-user.target

このようにserviceファイルを作り、

terminal
1
sudo systemctl enable --now pleroma.service

と打って終了。
これで無事にデーモン化しPleromaを構築することができた。

一応問題はないが、Raspberry Piの場合、チューニングが必要になることがある。

PosgtreSQLを調整し、Pleromaのレスポンスを向上する。 が参考になるだろう。

改善点

https://wut.m0r016.net/webにアクセスしたときにThe VAPID public key is not set. You will not be able to receive Web Push Notifications.及びGET https://wut.m0r016.net/api/v1/announcements 404と出てしまう問題を対処
Soapboxを組んでみる。

コメント